Keep on reading to find out how!
Things You'll Need:
Camera
Flash
Tripod (optional but highly recommended)
Assistant (optional but also recommended. You can use the timer function on your camera as well)
Photoshop (or any other photo editing software that allows you to use layer masks)
Step 1:
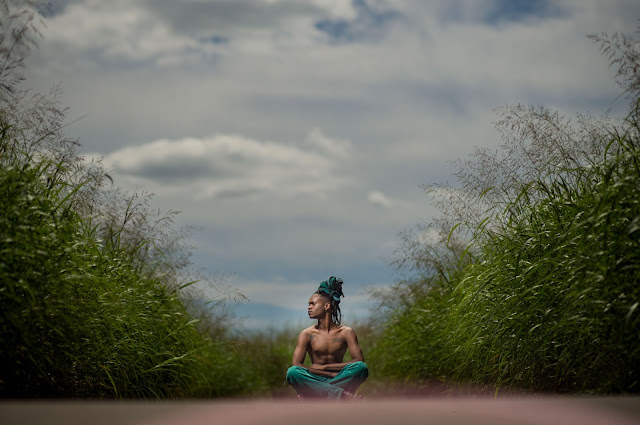
Find a cool location and place your model in the scene. After your model is in position have your assistant bring in the flash to light your subject. In this instance, my assistant was in the bushes camera left as seen in the image below...

After I got a pose and expression that I was happy with, I asked my assistant to step out of the frame. I then took another exposure with no flash...

Now its time for step 2!
Step 2:
First, you'll need bring your images onto your computer for post processing.
I use a combination of Adobe Lightroom and Photoshop (check out my post on workflow HERE)
After all of my images have been imported into lightroom, I select the image that has the best expression/pose as well as the image that was taken without the assistant in frame/no flash.
Select both images and "Control Click" > Edit In > Open as layers in photoshop...

Once both of the images are in photoshop, make sure that the layer with the flash is on top and the layer with no flash is on the bottom.

Next make sure the layers are properly aligned...
Select both layers > go to the "Edit" menu > click the "Auto Align Layers" option

I have found that the "Auto" option works just fine to align the layers. Especially if you used a tripod to shoot your images.
After your images are aligned, create a Layer Mask on the Flash layer by making sure it is the only one selected and clicking on the "Layer Mask" icon at the bottom of your develop panel.

Now that you have created your layer mask, make sure it is selected and begin to paint over the part of the image where your assistant is holding the light. Make sure you are using a large black brush that has a soft edge. See the video below...
After you have painted over the part of the image you don't want to see, save the image and make any final adjustments in Lightroom. Be sure to crop your final image because the aligned layers will leave a small boarder around the edge that you'll want to get rid of.
If you have any questions please feel free to ask and I will do my best to respond in a timely manner.
I hope you enjoyed this little tutorial and if you want to see more be sure to subscribe and also follow us on Instagram @ReadylightMedia and "like" us on Facebook!
Until next time,
Jeff C.
No comments:
Post a Comment